TOTAL FREE HEALTH AND SAFETY DOCUMENTS DOWNLOADING SOURCE


Breaking

Tuesday, November 30, 2021

November 30, 2021

Risk Assessment for Tower Crane Installation-Erection

To download a complete and detailed Risk Assessment for Tower Crane Installation-Erection in A3 Word easy to use and editable format, click at the bottom given link or click here at DOWNLOAD FILE. To download more health and safety free documents, keep on visiting the site. To help HSE DOCUMENTS work, kindly share in your social media accounts and your friend’s circle. This site is free for visitors, and you can help us by watching and clicking ads on our website.

ACTIVITIES

1- PRE-COMMENCEMENT ACTIVITIES

  • Pre-approval of foundations for the rail system installed at the site, including the electrical supply
  • Pre-Commencement Activities (Obtaining Method Statement, J.S.A. and STARRT Form)
  • Site preparation Slinging preparation

2- TRANSPORTING MATERIALS

  • Ensure the safety of Components of Tower
  • Crane from Outside (the crane parts have been dimensioned in such a way that no special transport arrangement is needed)
  • Ensure the counterweights on a truck
  • Receiving equipment/materials at the site (the reception and unloading of the parts must be performed systematically)
  • Unloading Material using Mobile Crane

3- ERECTION and INSTALLATION OF THE RAILING (TRAVELLING CARRIAGE) TO APPROVED FOUNDATION

  • The travelling carriage comprised one fixed and two mobile chassis beams which are linked together using PINS & ensure the PINS was attached.
  • The boogies must BE LOCKED PROPERLY AND SECURELY to the track rails using rail clamps for the duration of the erection.
  • Using mobile crane
  • Bolting of the railing

4- ERECTION and INSTALLATION OF CLIMBING CAGE

  • Using mobile crane
  • Tightening of the loose grate’s screws
  • The attached top of the tower and slewing ring with planes are lifted in place and fastened to the tower by a screw joint
  • Working at heights

5- GROUND ASSEMBLE OF COUNTER JIB AND SUPPORT BARS

  • Using mobile crane
  • Bolting, hammering, and screwing

6- ERECTION and INSTALLATION OF COUNTER JIB AND SUPPORT BARS

  • Using mobile crane
  • Electrical connection
  • Working at heights
  • Tower top crane assemble

7- ERECTION AND INSTALLATION OF COUNTERWEIGHT

  • Using mobile crane

8-ERECTION and INSTALLATION OF OPERATOR CABIN

  • Using mobile crane
  • Installation of control cables and electrical to the operator cabin.
  • Placing a ballast weight into the hook (All jib lengths are balanced with a 2000 kg weight
  • Ballast weight)
  • Installation/connection of hydraulic system, aggregate, and hoses (including electrical
  • supply)
  • Climbing and Jacking continued along the climbing cage
  • Erecting the tower part (Lock Pin,
  • Balancing weight, Special strops, Adjustment devised of the trolley’s transfer rope) use of Tower crane

9- AFTER THE DESIRED HEIGHTS HAS BEEN REACHED

  • Fastening of the rope end
  • Mounting of the security rope
  • Crane adjustment and testing for operation

Download File


Wednesday, November 24, 2021

November 24, 2021

Risk Assessment for Nail Gun (Pneumatic)

HSE documents is providing total free health and safety content to its visitors in quality editable ready to use formats.  We are still in updating process and time to time adding more QHSE documents for various business sectors and also for personal guidance. The Following is are some highlights point that covers the attached editable original file itself. just click on the download link given at the end of the points and you will get your required documents:

Significant Hazard / Hazardous Situation:

  1. Impact And Cutting
  2. Shearing
  3. Pressurised Content
  4. Electricity
  5. Ergonomics
  6. Radiation
  7. Noise
  8. Vibration
  9. Friction
  10. Condition
  11. Slips/trips/falls
  12. Fire And Explosion
  13. Temperature/moisture

Download File 👇
Risk Assessment for Nail Gun (Pneumatic)


Tuesday, November 23, 2021

November 23, 2021

Scaffold Inspection Checklist

To download various free and editable HSE documents, visit our site at hsedocuments. Following are some of the main points taken from the Scaffold's checklist original file. and to download the editable word format file, click the download link given at the end of these points:

  • Are scaffolds components and planking (wooden & metals) in a safe condition for use and is plank standardized and graded for scaffold use?
  • Are the frame spacing and section size enough to carry the required loadings?
  • Have skilled/competent and well-qualified persons been in charge and accountable for erection?
  • Are sections appropriately placed and adequate size?  
  • Have screw jacks been used if required and to level and plumb scaffold instead of unstable/weak objects such as concrete blocks, loose bricks, etc.?
  • Are various components or parts such as base plates and/or screw jacks in firm contact with sills and frames? 
  • Is scaffold level and plumb securely and properly?
  • Are all scaffold legs braced and braces appropriately and strongly attached?
  • Are all guard railings adjusted on all open sides and ends? 
  • Has appropriate access been provided?
  • Has overhead protection or wire screening been provided where required and mandatory?
  • Has scaffold been tied securely to structure at least every 30 in length 26 in height? 
  • Have brackets and accessories been properly placed?
  • Is scaffold-free of devices, ladders or other tools to increase height?
  • Are working platforms completely planked between guardrails?  
  • Does plank have 6 inches to 12 inches overlap beyond supports?
  • Are toeboards installed properly and securely?  
  • Have hazardous conditions/environment for Power lines, Wind loading, Possible washout of footings, Uplift, and overturning moments due to placement of brackets, putlogs, or other causes been rectified and assessed?  
  • Have the personnel been instructed in the safe use of the equipment?


Download File
Scaffolds Inspection Checklist

November 23, 2021

LONE WORKING SAFETY TOOLBOX TALKS

LONE WORKING SAFETY TOOLBOX TALKS


To download occupational health safety and environmental free documents in editable format; visit our blog at hsedocuments.com; where you can download all free content. Following are key point taken from the original "LONE WORKING SAFETY TOOLBOX TALKS" file: 

1-Objectives

This talk covers the following points: 

  • To develop and implement a Work Alone Policy.
  • What does Working Alone mean?
  • To assess the hazards and risks of the work environment.
  • To  develop, establish health and safety procedures and policies.
  • To  communication between worker and the supervisor.

2-Introduction:

Employers have the accountability & responsibility to protect and safeguard their employees while at work. This is regardless of whether the employee works alone or with co-workers. OSHA does not have a specific requirement regulating lone workers. However, they do recommend organizations/companies to establish and implement a Work Alone Policy under the [Law & rules of the state/country where the business exists]. 

3. Discussion:

Most employees carried out job tasks where they must work alone. The term Working alone means “working where you cannot be seen or heard by another person and where you cannot expect a visit from another person during your work assignment.”

Employers should take into consideration/account circumstances when employees work alone. They should assess the hazards of the work environment and develop effective health and safety procedures and policies that address these hazards. The purpose of the hazard and risk assessment is to identify what needs to be done to control and mitigate the occupational health and safety risks for the lone employees. These are basic legal requirements that should be carried out for all workers. The companies with five or more employees are legally required to keep a record of the risk assessment. This should be part of the Work Alone Policy.

It’ important to provide training for lone workers so they understand what is expected of them. It’s essential to have a work procedure that directs them on how to work alone safely. A step-by-step guide should be used until the procedure becomes routine.

Ensure there is contact between the lone worker and the supervisor by phone or two-way radio. Install an automatic warning device that will sound if a signal is not sent and received from a lone worker. Monitoring the health and safety of the lone worker is essential because of limited contact. All POSSIBLE EFFORTS should be made to secure the safety of the lone worker; communication is vital.

Implementing safety measures can reduce the number of work-related injuries and fatalities that pose a risk for employees working alone. Avoid having a lone worker whenever possible. 

4-TASKS INVOLVING WORK LONE WITH GREATER RISKS

  • Time your tasks carefully to identify with when others are present.
  • Seek assistance from persons nearby or your supervisor or manager.
  • When you have to work alone, take extra care to ensure that you do not put yourself in
  • any unnecessary danger. If you have any doubt about your ability to undertake and fulfil a task safely, do not start the task. Search for further advice from your site supervisor or project manager.
  • The activities which must never be undertaken while working alone are those which
  • involve any form of entry into a confined space, and (even if you are qualified and competent and experienced to do so) any form of work involving live electrical conductors
  • Tasks that could involve risks and which are best avoided when working alone if this is possible, include:
  • Welding, burning and other hot work.
  • Handling or use of corrosive or dangerous substances/materials.
  • Working at height.
  • Work involving excessive manual handling.
  • Working under vehicles or heavy plants.

5-BUDDY SYSTEM

What Does Buddy System Mean?

“A buddy system is a type of health and safety management practice in which each individual  are teamed up and given responsibility and assigning accountability for ensuring each other’s safety”.

It usually describes a mutual arrangement in which both parties are conducting the same hazardous work and have equal responsibility for each other’s safety. However, in some hazardous work or process cases, only one buddy may be assigned to do a task, while the primary responsibility of the other buddy will be to make sure the partner’s safety.

In high-risk, allow the option of a “buddy system” or the use of surveillance cameras for observation. If it’s determined that it’s too much of a risk for a worker to work alone safely, the employer must not allow an employee to work alone under any circumstance.

“As always, stay safe out there!”


Download File

Lone Working Safety Toolbox Talks 

Sunday, November 21, 2021

November 21, 2021

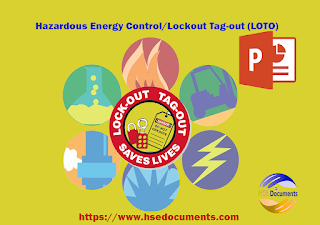
PowerPoint for-Hazardous Energy Control/Lockout Tag-out (LOTO)

The following are some main highlights from the PowerPoint for-Hazardous Energy Control/Lockout Tag-out (LOTO)  original format:

What is the basic purpose of a hazardous energy control program?

Most of the machinery, equipment, or systems will have safety devices built in. These safety devices include barrier guards and safeguarding devices to help protect employees/workers during normal operations for such machinery, equipment. However, sometimes during maintenance or repairs, these devices may have to be removed or bypassed. In these circumstances and situations, a hazardous energy control program is needed.

A Hazardous Energy Control Program (HECP) is used to maintain worker safety by preventing the following:

  • Unintended release of stored energy.
  • Unintended start-up.
  • Unintended motion.
  • Contact with a hazard when guards are removed or safety devices have been bypassed or removed.

What must an energy-control procedure include?

  1. A statement on how to use the procedures.
  2. Procedural steps to shut down, isolate, block, and secure machines.
  3. Specific steps designating the safe placement, removal, and transfer of lockout/tag-out devices and identifying who has responsibility for the lockout/Tagout devices.
  4. Specific requirements for testing machines to determine and verify the effectiveness of lockout devices, tag-out devices, and other energy control measures.

What must EMPLOYEES/WORKERS do before they START service or maintenance activities?

  1. Prepare for shutdown
  2. Shut down the machine.
  3. Disconnect or isolate the MACHINE, EQUIPMENT, OR DEVICE from the energy source(s).
  4. Integrate or install the lockout or tag-out device(s) to the energy-isolating device(s)
  5. Release, detain or otherwise render safe all potentially hazardous stored or residual energy. 
  6. If a possibility exists for deaccumulation of hazardous energy, regularly verify during the service and maintenance that such energy has not reaccumulated to hazardous levels.

Lockout Process

  • De-energize machinery
  • Stop equipment using the normal procedure  
  • Isolate each source.
  • Each person must lockout each source of energy. 
  • The key(s) must be removed and secured in personal control.  
  • Verify isolation of each energy source
  • Return controls to “neutral”, “stop”, or “off” positions after the verification.
  • Perform the required work.


Download File👇

PowerPoint for-Hazardous Energy Control/Lockout Tag-out (LOTO) 

November 21, 2021

Toolbox Talks-Personal Protective Equipment (PPE)

 The following are some main highlights from the toolbox talks original format:

A. Objectives

This talk covers the following points: 

  • Protection Against Various hazards.
  • Compatibility with PPE Users. 
  • PPE Pre-use user checks. 
  • Safe use of PPE.
  • PPE Use as Last Resort.

B. Protection Against Hazards/Risks

  • High-speed flying particles, 
  • Vapors, and splashes inhaling dust or fumes, 
  • Electrical shock, 
  • Cuts & abrasions, 
  • Noise, 
  • Falling objects, 
  • Foot, 
  • Others.

C. When PPE Should Be Worn?

Before you resort to Personal Protective Equipment (PPE), you should first:

Use administrative controls

  • Does the job need to be done?
  • Can you use multiple people at different times so one person is not exposed to a hazard for an extended period?

Implement Engineering Controls

  • Use local exhaust or general ventilation. 
  • A Respirator Control Dust (RCD) with a wet process essentially.
  • Install sound-reducing devices to mechanical equipment.
  • When these other two means of protection are failed and do not work properly, you then will need to select the appropriate PPE. (Often PPE will be used in conjunction with administrative and engineering controls for added protection.)

D. Basic Types of PPE:

Head: Hard helmet Protects against falling, bumping, splashing, electrical hazards)
Hearing Over 90 Decibels for 8 hours a day requires and recommends hearing protection.
Ear Muffs or Ear Plugs: One size fit all, comfortable, less ear infection risk
Face/Eye: Working with any chemical or using any mechanical equipment
Face Shield:  Protect face from splashing and particles
Safety Glasses: Protection from solids (cutting, sanding, grinding.
Safety Goggles:  Protects eyes from splashing
Hand Use correct glove for the job
Gloves Chemical:  Refer to manufacturer info for breakthrough rating for different gloves (Nitrile, Latex, PVC…
Gloves: Special gloves for slicing/cutting, burning, abrasions/blisters.
Body: Never reuse Tyvek suits and wash lab coats after every use
Lab Coats:  Protects clothes/skin from minor splashes
Tyvek Suits:  Can protect against dust, vapors, and splashes (depending on the type of suit)
Safety Toe/Steel Toe Boots:  Always worn when the potential for falling hazards exists
Water/Chemical Resistant Booties:  Use in a spill situation

E. Group Discussion Topics

  • What jobs require you to wear Personal Protective Equipment (PPE)?  
  • What possible injuries could result from not having Personal Protective Equipment (PPE)?  
  • Has anyone been injured when Personal Protective Equipment would have prevented the injury?
  • Inspect your work area for Personal Protective Equipment; replace broken equipment, order-missing equipment

Download File

Friday, November 19, 2021

November 19, 2021

Jobs

FIND A JOB


SAFETY COORDINATOR

https://jobs.alghaziuae.com/job/safety-coordinator-3 


NOTE:

External Links Disclaimer.

My Blog website https://www.hsedocuments.com may contain JOB POSTING LINKS to external websites/sources that are not provided or maintained by or in any way affiliated with My Bloghttps://www.hsedocuments.com. Please note that the My https://www.hsedocuments.com does not guarantee the accuracy, relevance, timeliness, or completeness of any information on these external websites

Sunday, November 14, 2021

November 14, 2021

What is 5S and What Does5S Stands for?

What Is 5S?

In this article, we will discuss 5S. The term “5S” is a methodical form of Visual Management (VM) utilizing everything from floor type to operations manuals. If we look generally, it is not just regarding cleaning activities and or company; it is also about enhancing efficiency and profit within the organization. 5S is a systemic structure that affirms the use of a particular mindset and tools to establish efficiency and value. 

It includes the following: 

  • Observing. 
  • Analyzing.
  • Collaborating.
  • Searching for waste. 
  • Covers the practice of removing waste. 

What Does 5S Stand For?

5S, sometimes called Five S, refers to five Japanese terms used to narrate the steps of the Five-S system of Visual Management (VM). 

Each term starts with an S. In Japanese, the five Ss are:

  • Seiri
  • Seiton
  • Seiso
  • Seiketsu
  • Shitsuke

3. In English, the five S’s are translated as the following:

  • Sort
  • Set in Order
  • Shine
  • Standardize
  • Sustain

There are five key practices involved in 5S. They are as follows:

1-Sort

Sort through materials or substances, keeping only the necessary items required to accomplish tasks.

This action includes the detailed and comprehensive observation of a workspace to regulate which are most needed and which can be removed. 

Everything that is not used to accomplish a work process should leave the work area.

2-Set in Order

  1. Make sure that all items (may include material, substances, or chemicals) are well organized and each material has a designated storage area. 
  2. Organize all the items reasonably left on the worksite so they make tasks easier for workers to complete. This often includes putting items in ergonomic locations where people will not require to bend or make additional movements to reach them.

3-Shine

  1. Aggressive efforts to maintain work areas tidy and orderly to make sure purpose-driven work. 
  2. This also means that properly and essentially cleaning and maintaining the newly organized worksite. 
  3. It can include regular activities/tasks such as mopping, dusting, etc. 
  4. Performing MEP on machinery, tools, and other equipment.

4-Standardize

  1. Establish a set of standards for both organization and processes. 
  2. In crux, this is where you take the first three S's and make rules for how and when these tasks will be adopted, followed, or performed. 
  3. These standards can involve schedules, charts, lists, etc.

5-Sustain

  1. Preserve and save new practices and carry out audits to retain and manage discipline. 
  2. This “fifth S-Sustain “means the previous four S's must be continued over time. 
  3. This is gained by establishing a sense of self-discipline in employees of the organization who will participate in 5S.

Download File

What is 5S and What Does5S Stand for?

Saturday, November 13, 2021

November 13, 2021

Method Statement for Tiles Installation and Fixing Procedure

The following are a few lines of content taken from the original file that is attached at the end of this content. to download more quality Occupational Health Safety and Environmental documents, just keep on visiting our blog at hsedocuments.com, where you will get all editable qhsedocs free:

Laying ceramic tiles by Semi-Dry Mix Method.

  1. Dry Mix Method shall consist of ration (1:4) 1 part of ordinary Portland Cement to 4 parts of sand by volume to form the sand-cement mortar, mixed semi-dry in a mechanical mixer with only sufficient quantity of water added to give a powdery or soft texture or flexibility that maintains or intact its shape when squeezed in the hand. 
  2. To keep the firmness and strength of the mix, the volume of water added is to be kept the same for each batch.
  3. The minimum recommended thickness of Dry Mix bedding with such a system of laying is to be 40 millimeters.
  4. The mix is to be spread to a thickness of relatively 10 millimeters greater than that required for the bed and be completely compacted by tamping and drawing off to the needed and recommended level with a screed board which will give even completion and level surface of the work. Only sufficient & appropriate and recommended mortar is to be mixed and spread as can be covered with tiles before it has secured its initial set.
  5. A thin layer of the slurry of 1:1 (1 part cement and 1 part sand), by volume, is to be poured over the surface of the semi-dry mix bedding and spread with a trowel until it is approximately 2 millimeters thick. Approved adhesive to be applied to the tiles to be laid while the slurry is wet and beaten and mixed firmly into position with a wooden beater to make sure a true and stable surface and contact between the tiles and bedding is accomplished.
  6. Get approval for tile layout through dry laying before proceeding with tile work if the start of the point is not shown in the drawing. In absence of a start-off point or approved layout, arrange tiles so that cut tiles occur at wall lines only and are the minimum, and where they do occur, they are as large as possible.
  7. Before tile fixing check that any color, shade variations, and sizes are acceptable.
  8. Lay the side of the tile by side or keep the specified gap joint by the use of tile spacers as per the approved pattern as shown in the approved drawings. The tiles must be accurately, correctly and in leveled position at the time, they are placed and laid with joints as shown in the approved drawing.
  9. Carefully remove the tile spacers after the laid tiles are set enough to prevent difficulties of pulling out the spacers.
  10. Tiles shall be placed firmly according to the level shown in the approved shop drawing.
  11. Tiles shall be placed firmly according to the level shown in the approved shop drawing.
  12. A spirit level should be used to make sure that the tiles are leveled during the installation process.
  13. Accurately and appropriately form intersections and returns. Conduct cutting and drilling of tile without deteriorating visible surfaces. 
  14. Fit and adjust tile closely to electrical outlets/installations, piping, fixtures, and other penetration, collars, or covers.
  15. Tiles are to be laid level or 1% falls/or as shown in the approved drawings in “wet” areas, as required. Localized variations in level for a nominally flat floor are to be a maximum of +/- 3 mm under a 3 m straight edge. Particular care is to be taken in “wet” areas to prevent low spots and the pooling of water. No soaking is needed for fully vitrified tiles or when the adhesive is used.

Download File👇

Method Statement for Ceramic Floor Tiles

Wednesday, November 10, 2021

November 10, 2021

Safe Work Procedure for Angle Grinder

To download the  Safe Work Procedure for Angle Grinder, just click in the download link at the end of this article:

Description of Work for using an Angle Grinder:

  1. High-speed flying particles. 
  2. Inhaling dust or fumes.
  3. Kickback, fires & explosions, 
  4. Electrical shock.
  5. Cuts & abrasions. 
  6. Noise.
  7. Musculoskeletal disorders (MSDs)-repetitive motion & awkward work positions.

Safe Work Procedure Checklist points

1-Pre-Operation Task:

  1. Task (e.g., Drawings, instructions, specifications etc.) is readily available and understood.
  2. Ensure the appropriate grinder disc is accurately in place.
  3. Ensure the workpiece is securely clamped.
  4. Ensure appropriate guarding is in place on the grinder.
  5. Identify the ON/OFF switch. 

2-Operation Task:

  1. Check and verify that the grinder disc runs 'TRUE' and does not wobble.
  2. Keep hands clear of the workpiece and away from the disc.
  3. Tum off grinder at power Point before changing the disc.
  4. Ensure guarding is in place before re-starting the grinder.
  5. Make sure that the machines have been isolated from power sources before being cleaned, adjusted, maintained and or repaired.

3- Post-Operation Task:

  1. Switch off /disconnect the grinder before removing waste material or dust from the bench.
  2. Ensure the disc is still in good condition before putting away.
Download File👇

Monday, November 8, 2021

November 08, 2021

Ladders and Stepladders Toolbox Talks

The following are some main highlights from the toolbox talks original format:

1- Objectives

This talk covers the following points: 

  • General hazards.
  • Restrictions. 
  • Pre-use user checks. 
  • Safe use of ladders.
  • Step ladders.

2- Hazards / Risks

  1. All types of ladders are one of the most used and misused pieces of access equipment.
  2. The use of ladders with care and in safety will help to prevent/minimize potentially fatal accidents.

3- Before using a ladder and pre-use checks:

  • The law of every state/country requires that careful importance is given before work is carried out at height.
  • Use of a ladder is only allowable if it is a short duration (less than 30 minutes) and has been justified by a risk assessment. 
  • Ladders and stepladders should be kept and stored correctly when not in use and inspected frequently. 
  • Before use, carefully check and observe for splits or cracks in the stiles and rungs, inspect for missing or loose rungs, paint, oil, or grease on stiles or rungs that could cause severe physical fall injuries due to slip. 
  • If any defects are found, you must report them, label the ladders as defective, and remove them from the site

4- Hazards

  1. Do not use painted ladders as the paint may be hiding damaged parts.
  2. Never try to use or repair broken ladders or their parts.
  3. Never stand a ladder on a drum, box, pallet, bricks, forklift forks, mobile access tower, the top of a van or other vehicle, or another unstable base or moveable object.
  4. Only fewer weight materials and tools should be carried up ladders as per the risk assessment and manufacturer’s information
  5. When using ladders, make sure there are no electrical hazards nearby (such as overhead powerlines).
  6. Do not overreach or apply a sideloading when working from a ladder or stepladder

5- Safe use of ladders and stepladders

  • Before carrying out any work at height, a comprehensive hazard and risk assessment must be accomplished. 
  • To justify the use of a ladder, the risk assessment must identify those other forms of access equipment that are not suitable due to environmental conditions such as floor to ceiling height, space constraints, or restrictions.
  • Only light work of short duration with a low risk of falling should be carried out from a ladder or step ladder
  • Ladders should be set on a firm base and lean at the correct angle (one unit out to four units up, or 75 degrees is recommended)
  • Ladders should be secured appropriately and near the top and extend at least 1 meter above the landing point unless a separate handhold is provided accordingly.
  • If the ladder can’t be secured properly at the top, it may be possible to secure it lower down.
  • Make sure that the footwear is free from contaminants such as excessive mud or grease before you climb up the ladder
  • When climbing up or down on the ladder (fix or portable), use both hands on the stiles. 
  • Always face the ladder (remember 3-points rule)
  • Never over-reach from any type of ladder particularly the step ladder. Move it if you cannot reach it.
  • Where a handhold cannot be maintained for anything other than a brief moment, other fall prevention measures are required
  • Never attempt to stand or work on the top three steps of a stepladder (Including a step forming the very top of the stepladder) unless there is proper and suitable handhold support. 

6-Questions?

  • What types of checks and inspections must you carry out before using a ladder or stepladder?
  • At what safe angle should a leaning ladder be placed?
  • What can you do to improve the stability of the ladder?
  • What precautionary measures should you take when using a metal ladder?
  • What should you do, if you find a defective ladder?
  • What is the correct and secure way to climb a ladder

Download File👇

Ladders and Stepladders Toolbox Talks 

Saturday, November 6, 2021

November 06, 2021

Roof Gutter Cleaning Risk Assessment

HAZARD IDENTIFICATION AND CONTROL MEASURES

Identification of significant hazards

  • Work at height.
  • Falling objects, debris.
  • Weather conditions e.g., strong and heavy winds, heavy stormy rain, extremely hot weather etc.
  • Pedestrian/vehicular traffic.
  • Lone working/ Remote working.
  • Fatal electric shock from overhead or exposed power lines/cables.
  • Fragile roof; roof/skylights.
  • Hazardous substances e.g., asbestos roof tiles.
  • Foreign bodies within debris (needles, glass etc.).
  • Disposal of debris.

Who might be harmed?

  • Site Supervisor and others in the vicinity.
  • Any person in the direct vicinity of the ladder.
  • Site Supervisor.

Type of harm and Consequences

  • Death. 
  • Fractures.
  • Musculoskeletal injuries.
  • Head injuries/concussion. 
  • Bruising, lacerations.
  • Fall injuries.
  • Sunburn.
  • Heat exhaustion.
  • Burns/electric shock/fatality.
  • Cuts, Needlestick injuries, infection.

Existing Control Measures

  • Try to avoid the need to work from height by the use of appropriate equipment and or light machinery to clean the gutter at ground level such as a long rake.
  • In case to use the equipment for work at height, the site supervisor/engineer selects the correct work at height equipment for the task such as a ladder, step ladder.
  • The site engineer/supervisor reads the assessment in conjunction with the establishment's risk assessment for the work at height equipment/machinery and its uses.
  • Work at height equipment e.g., step ladders is subject to routine inspection.
  • The site Supervisor is competent and skilled to use the equipment e.g., has undertaken the Lancashire County Council Health and Safety E-learning module for Ladder Safety or equivalent.
  • The site Supervisor does not undertake work at height when alone at the site.
  • Warning signs are used to ensure everybody is aware that work at height is underway before they enter the work area. Cordon off area, if possible, if required alternative routes should be signposted.
  • A safe working area is cordoned off around the work at height equipment and signage is used as appropriate.
  • A belt holster or belt hooks are used for carrying tools up/down the ladder safely.
  • Any employee footing the ladder is advised to wear head protection.
  • The cleaning employees are inducted and advised to bag any debris into small quantities and lower it slowly to the ground level.
  • The site engineer/supervisor evaluates the weather conditions before undertaking external work and does not undertake the task if conditions are not suitable.
  • The site Supervisor wears clothing as per the weather conditions.
  • The site Supervisor wears clothing to cover skin and wears sunscreen in hot sunshine.
  • The site Supervisor keeps well hydrated and takes regular breaks in hot weather.
  • Evaluate/Access to the work area is restricted/monitored.
  • Designated pedestrian routes are put in place to restrict unauthorized access.
  • Work is planned for quieter times of the day when reduced/restricted pedestrian access is required to the area.
  • A safe working area is cordoned off around the area and signage is used as appropriate.
  • High visibility clothing is worn by the Site Supervisor if working on the traffic route.
  • The task is not undertaken when school/site is unoccupied, for example, school holidays.
  • A nominated and accountable person is informed at the site if undertaking work at height in an unoccupied area.
  • The site Supervisor inspects the area to identify any electrical hazards / overhead power cables.
  • No work is carried out within 6 meters of high voltage cables.
  • Live supplies are isolated where necessary.
  • Aluminium ladders are not used where an electrical hazard exists.
  • Fragile roofs are signed.
  • Roof/skylights are protected where appropriate.
  • Asbestos risk assessment was reviewed before the commencement of work.
  • Visual inspection for any signs of damage or destruction, before work commences.
  • The site Supervisor is instructed to cover open wounds with waterproof dressings.
  • Personal protective equipment (PPE) such as gloves, aprons are worn as appropriate to the task.
  • Appropriate and essential equipment is used e.g., litter picker, tongs, plunger or drain rods to remove an object.
  • Hands are not used to free blockages.
  • Strict personal hygiene is observed by the site engineer/supervisor and hands are washed thoroughly after the task.
  • The site Supervisor is advised to follow the guidance on dealing with Sharps and Needle-stick Injuries available on the Health, Safety & Quality web page called 'Infection Control'.
  • All debris is to be deposited in appropriate waste containers for disposal.

Download File👇

Roof Gutter Cleaning Risk Assessment