TOTAL FREE HEALTH AND SAFETY DOCUMENTS DOWNLOADING SOURCE


Breaking

Showing posts with label HSE Trainings. Show all posts

Wednesday, April 30, 2025

April 30, 2025

HSE DOCUMENTS-HSE INDUCTION AGENDA FOR NEW JOINERS


HSE DOCUMENTS-HSE INDUCTION AGENDA FOR NEW JOINERS


An appropriate HSE induction agenda is integral to the compliance of a workplace with safety measures. It ensures that newly recruited employees know occupational hazards, emergency procedures in annex usage, personnel protective equipment requirements, and the company's safety policies. Topics would include risk assessment, fire safety, first aid, and incident reporting.


It also emphasizes that an effective HSE induction will enable an organization to reduce accidents, promote safety awareness, and comply with regulations. The training would include interactive programs and safety practices such as drills and review documentation.


HSE management systems will optimize clearer agendas: employee safety, OSHA alignment, and hazards prevention. Also, ensure workplace safety training becomes a priority to create a zero-harm culture. 


1.0. HSE Introduction 

1.1. Importance of HSE in facility management and FLS services. 

1.2. Company HSE policy, objectives, and culture. 

1.3. Employee roles and responsibilities under IOSH//OSHA/ADOSH. 


2.0. Legal and regulatory requirements

2.1. General idea on IOSH//OSHA/UAE ADOSH regulations and other international standards (for example ISO 45001). 

2.2. Principles on "Working Safely" of IOSH. 

2.3. Non-compliance leads to punishment (fines, incidents, reputational damage). 


3.0. Workplace hazards in facility management 

3.1. Common hazards-Slips/trips/falls, electrical risks, working at height, confined spaces, moving machinery, chemical exposure (cleaning agents). 

3.2. FLS-specific risks-Fire system maintenance, hot work permits, gas safety, and emergency lighting checks. 

3.3. Hazard identification and reporting protocols. 


4.0. Fire safety & emergency handling 

4.1. Fire prevention (storage, ignition sources). 

4.2. Using extinguishers and suppression systems done practically by video. 

4.3. Evacuation routes, assembly points, and responsibilities during drills. 

4.4. ADOSH-related rules for fire safety in facilities. 


5.0. Safe work practice 

5.1. Permit-to-work (PTW) s: Lockout/tagout (LOTO), confined space entry, hot work. 

5.2. Manual handling: Safe lifting are techniques for equipment/loads. 

5.3. PPE: Types (gloves, helmets, safety shoes, harnesses) and their correct usage. 

5.4. Toolbox talks and daily risk assessments.


6.0. Incident Reporting and Investigation 

6.1. Incident/near-miss reporting procedures (company-specific forms/software).

6.2. ADOSH timetable for incident reporting.

6.3. Report near misses to avert similar accidents in the future. 


7.0. Environmental Management 

7.1. Waste segregation (e.g. hazardous waste from maintenance activities).

7.2. Energy/water conservation in the operation of the facility.

7.3. Control of spill and prevention of pollution. 


8.0. Health & Wellbeing 

8.1. Heat stress prevention (very critical for UAE/or as per your State/country’s outdoor work).

8.2. Ergonomics in desk-based and manual roles.

8.3. Awareness of mental health and supportive resources. 


9.0. Company-Specific Protocols 

9.1. Site-specific risks client facilities, high-rise buildings).

9.2. Client HSE requirements (if any).

9.3. Contact information for HSE officers and first aiders. 


10.0. Assessment & Q&A 

10.1. A quick quiz to double-check understanding (e.g. fire extinguisher types, hazard reporting).

10.2. Open Forum for questions.


Download File Now

Sunday, November 24, 2024

November 24, 2024

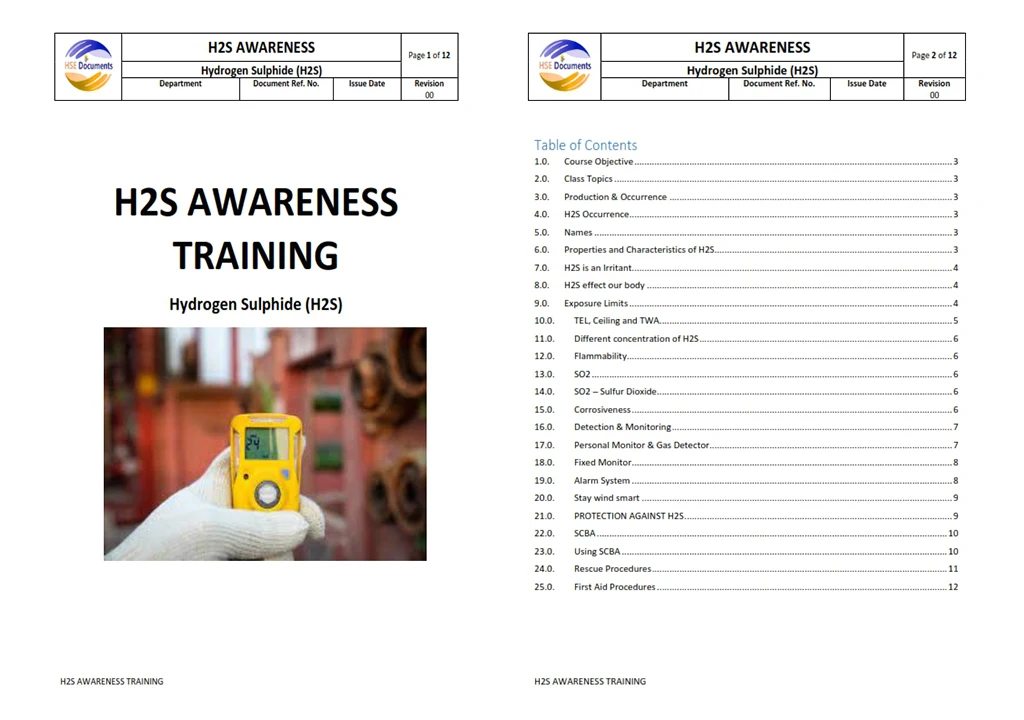
HSE DOCUMENTS-HYDROGEN SULPHIDE (H2S) AWARENESS TRAINING

HYDROGEN SULPHIDE (H2S) AWARENESS TRAINING


TABLE OF CONTENTS 

1.0. Course Objective

2.0. Class Topics

3.0. Production & Occurrence

4.0. H2S Occurrence

5.0. Names

6.0. Properties and Characteristics of H2S

7.0. H2S is an Irritant

8.0. H2S affects our body

9.0. Exposure Limits

10.0. TEL, Ceiling, and TWA

11.0. Different concentrations of H2S

12.0. Flammability

13.0. SO2

14.0. SO2 – Sulfur Dioxide

15.0. Corrosiveness

16.0. Detection & Monitoring

17.0. Personal Monitor & Gas Detector

18.0. Fixed Monitor

19.0. Alarm System

20.0. Stay wind smart

21.0. PROTECTION AGAINST H2S

22.0. SCBA

23.0. Using SCBA

24.0. Rescue Procedures

25.0. First Aid Procedures


1.0. Course Objective

1.1. To prepare the Employees to know what are the potential hazards when working around the environment of Hydrogen Sulphide.

1.2. How to protect themselves from H2S, and other employees. 


2.0. Class Topics

2.1. Production

2.2. Properties and Characteristics

2.3. Effect on our Body

2.4. Exposure Limits

2.5. Monitoring

2.6. Emergency Procedures

2.7. Rescue

2.8. First Aid Procedures 


3.0. Production & Occurrence

3.1. H2S is a deadly gas comprising one atom of sulfur and two atoms of hydrogen.

3.2. H2S formed when bacteria break the sulfur-rich proteins found in dead plants and animals where oxygen is not present

3.3. H2S is created by chemicals or bacteria introduced into the formation during production operations. Such as acidizing or water 


4.0. H2S Occurrence

4.1. The largest industrial producer of H2S is the Petroleum Industry.

4.2. Other sources include coke ovens, paper mills, and tanneries.

4.3. H2S gas can also be present naturally in well water, is used widely in refining processes, and sometimes in sewerage lines and manholes. 


5.0. Names

5.1. There are many names for H2S

5.2. Sour Gas

5.3. Rotten Egg gas

5.4. Sulphureted Hydrogen


6.0. Properties and Characteristics of H2S

6.1. There are many other names for Hydrogen Sulphide but the most common name is‘H2S’ 

6.2. Colorless

6.3. Offensive odor (rotten eggs)

6.4. Concentrations >100ppm (Parts per Million) paralyze the sense of smell

6.5. Extremely toxic

6.6. Easily dispersed by wind or fans

6.7. Flammable

6.8. Flammable Range from 4.3% LEL – 46% UEL

6.9. Corrosive

6.10. Heavier than air (specific gravity 1.189)

6.11. Soluble in oil and water. 


7.0. H2S is an Irritant

7.1. H2S is an irritant gas when reacts to water it forms a weak acid.

7.2. There is water in our eyes, nose, throat, and respiratory system which leads to irritation

7.3. Examples: burning eyes, sore/scratchy throat, and coughing, respiratory irritation. 

7.4. Normal Breathing System

7.5. When we breathe we breathe in oxygen and gas exchange takes place through air sacks (alveoli) in our lungs.

7.6. We then breathe out oxygen and carbon dioxide

7.7. Oxygen Reaction with blood

7.8. This oxygen is mixed with our red blood cells and when this blood moves in our body and brain our whole body gets oxygen as a result we can breathe.

7.9. H2S reacts to our brain:

  • Once H2S is in your brain it attacks the respiratory control center. H2S tries to shut it down, and as a result, we cannot breathe.
  • H2S also deadens the sense of smell.
  • At a concentration of greater than 100 ppm, your sense of smell is finished.
  • So never trust your nose to detect H2S.


8.0. H2S affects our body

H2S affects our body depends on three ways:

8.1. Duration:

  • How long have you been exposed to H2S

8.2. Intensity:

  • What is the concentration of H2S?

8.3. Susceptibility:

  • The Health of Individuals 


9.0. Exposure Limits

9.1. PEL (Permissible Exposure Limit):

  • Defined as a maximum air concentration you can be exposed for 8 hours a shift or 40 hours a week without respiratory protection.
  • Established by OSHA, making it law.
  • PEL for H2S = 10 PPM (Parts per Million)
  • In PEL you cannot exceed 10 PPM (Parts per Million) at any time.

9.2. STEL (Short-Term Exposure Limits):

  • Some gases and vapors have an allowable maximum Short Term Exposure Limit
  • Based on 15-minute time exposure STEL for H2S= 15 PPM (Parts per Million)

9.3. IDLH (Immediately dangerous to life and Health):

  • At once affects your body, irritation in your eyes, nose, and throat and you lose your sense at this concentration.
  • IDLH for H2S = 100PPM (Parts per Million)

9.4. TWA (Time Weighted Average):

  • Defined as the maximum concentration of any toxic gas to which a worker can be exposed for an average of 8 hours a shift or 40 hours a week.
  • TWA for H2S = 10 PPM (Parts per Million)
  • You can cross this range or less than this range, but your average should be
  • 10 PPM (Parts per Million) for 8 hours. Also, do not cross the ceiling value at any time or 15 PPM (Parts per Million) for 15 min only.

9.5. Ceiling:

  • Ceiling is the maximum concentration to which an unprotected worker may be exposed.
  • Ceiling concentration should never be exceeded even for an instant
  • The ceiling for H2S = 25 PPM (Parts per Million)


10.0. TEL, Ceiling, and TWA

11.0. Different concentrations of H2S

11.1. With different concentrations of H2S different effects on our health

11.2. 1 PPM              Smell (rotten egg)

11.3. 10 PPM            8 hr. TWA

11.4. 15 PPM            15 min

11.5. 100 PPM          Lose sense of smell, coughing, burning in eyes, headache and dizziness, and respiratory Irritation.

11.6. 300 PPM         Loss of consciousness with a time less than 30 min.

11.7. 1000PPM        Immediate respiratory arrest, loss of consciousness, followed by death. 


12.0. Flammability

12.1. H2S is a highly flammable and explosive gas

12.2. The flammability range

12.3. LEL = 4.3% or 43,000PPM: 1% = 10,000 PPM

12.4. UEL = 46% or 460,000 PPM

12.5. When H2S gets fire there is another toxic gas SO2 (Sulfur dioxide)

12.6. PEL for S02 = 2 PPM

12.7. IDLH for SO2 = 20 PPM 


13.0. SO2

13.1. SO2 is a colorless and highly toxic gas.

13.2. When it reacts with water it forms a weak sulfuric acid.

13.3. It burns with a blue flame.

13.4. It can suffocate the victims.

13.5. It will also burn your lungs from the inside by forming acid and destroying the alveoli.

13.6. Specific gravity of SO2 is 2.264 (where air = 1).

13.7. So it is heavier than air.


14.0. SO2 – Sulfur Dioxide

2 PPM: Safe 8-hour Exposure- TLV

5 PPM: Pungent detectable odor- STEL

12 PPM:     Severe chest constriction, throat &eye irritation – TLV- C

100 PPM:  Immediately Dangerous to Life & Health- IDLH

500 PPM:  Causes nausea, and suffocation even at first breath


15.0. Corrosiveness

15.1. H2S corrodes the carbon steel readily.

15.2. The oxidization (rusting) on the surface of the metal from iron sulfide scale, or black scale.

15.3. The iron sulfide scale is pyrophoric.

15.4. Iron sulfide will flash as it dries and is exposed to air.

15.5. H2S also produces corrosiveness in pipelines and drilling equipment causing them to break down. 

16.0. Detection & Monitoring

16.1. An essential part of an effective safety procedure

  • Human senses cannot be relied upon
  • At very low concentrations, H2S paralyzes the sense of smell.
  • Always trust on gas monitor.
  • When they give the alarm evacuate immediately. 

16.2. There are two types of monitoring

Many years ago some kind of animal detected H2S

  • Personal Monitor
  • Fixed monitors


17.0. Personal Monitor & Gas Detector

17.1. Small and convenient

17.2. Can be taken everywhere with you and is easy to use.

17.3. Monthly Pump check

17.4. Three months calibration.

17.5. Give alarm at 10 PPM

17.6. There is vibration, light, and alarm 


18.0. Fixed Monitor

18.1. On the rig floor at the Driller’s position and about 18 inches above the floor.

18.2. At the top of the bell nipple.

18.3. At the flow line opening to the shale shaker.

18.4. Cellar or underneath the choke manifold, above the choke manifold skid floor


19.0. Alarm System

19.1. Amber strobe lights and horn

19.2. First alarm at 10 ppm (visual)

19.3. High alarm at 20 ppm (visual & audible).

19.4. The alarm system shall be located in a clearly visible 

locations so that personnel in any work area can 

see and/or hear at least one set.

19.5. Audible alarms be inside the rig site living quarters.

19.6. The H2S alarm system shall be positioned at the rig camp 

so that all personnel can see and hear the alarm. 


20.0. Stay wind smart

20.1. Always pay attention to flags or wind socks

20.2. When the alarm sounds retreat crosswind to a safe breathing area.


21.0. PROTECTION AGAINST H2S

These are the types of respirators for the H2S environment

21.1. Air Line Unit

21.2. Escape unit

21.3. Self-contained breathing apparatus (SCBA)

  • H2S Environments require Positive Pressure in the face mask
  • Pushes the air out of the leaks instead of letting you pull toxic gases in 
  • The cylinder contained grade D or grade E air, not pure oxygen.
  • Air contains many gases

21.4. Escape Unit:

  • This contains only 5 min of air
  • Not used for rescue or work

21.5. Air Line unit:

  • This contains only 15 min air and this 15 min air is used for escape.
  • Use for work after taking the line from the cascade system. 


22.0. SCBA

SCBA (Self-Contained Breathing Apparatus). This contained only 30 of air. When we use SCBA

22.1. Gas testing

22.2. Rescue of casualty in enclosed or confined space

22.3. Firefighting

22.4. Containing or cleaning toxic spills

22.5. Where the use of cascade system air supply dangerous

22.6. Recovering control of adverse operational situation

22.7. In case of an emergency 

22.8. SCBA key features:

  • Positive pressure system
  • Open circuit
  • Demand valve
  • Pressure reducer 

22.9. SCBA face mask difficulties:

  • Facial hair
  • Spectacles
  • Using a mask in an enclosed space
  • Small or irregularly shaped faces 

23.0. Using SCBA

23.1. Prepare Equipment – check cylinder pressure, face piece, and harness.

23.2. Put on Cylinder – adjust and tighten straps.

23.3. Put on Face piece – Tighten straps starting at the chin first.

23.4. Negative Pressure Test – Block the face piece opening and breathe in to check for seal and breathe out to check the exhalation valve.

23.5.Connect Air – Open the cylinder, connect the regulator, and breathe. 


24.0. Rescue Procedures

  • 24.1. H2S kills many of us when we are not trained, and we attempt rescue.
  • 24.2. Remember always to protect yourself first than others.
  • 24.3. Always work in pairs or use the buddy system
  • 24.4. You should know how to use SCBA.
  • 24.5. If you are not trained do not do rescue 

A. Step 1 – Evacuate immediately – if there is a release of H2S you must evacuate the areas immediately, moving upwind or crosswind and to a higher location.

B. Step 2 – Sound the Alarm – notify the control room that there is an H2S release and where. Ask for help.

C. Step 3 – Assess the Situation – quickly assess if other hazards could put you at risk. (Explosive mixture)

D. Step 4 – Protect yourself by putting on SCBA. Always don breathing air before attempting a rescue. Use SCBA packs and never escape packs for performing a rescue. 

E. Step 5 – Rescue the victim – You may rescue yourself if you know help is coming. Move the victim upwind to fresh air.

F. Step 6 – Revive the Victim – assess the victim for vital signs. If not breathing artificial respiration must be started.

G. Step 7 – Get Medical Aid – All H2S victims require medical attention. Never leave the victim alone. 


25.0. First Aid Procedures

25.1. Determine unresponsiveness

25.2. Open the airway.

25.3. Give 2 slow breaths

25.4. Check for a pulse

25.5. If no pulse, begin chest compressions. 

25.6. 30 compressions and 2 slow breaths.

25.7. After 4 cycles or 1 minute, check pulse again.

Note: you should be trained in CPR before administering it.


Download File Now

Monday, November 11, 2024

November 11, 2024

HSE DOCUMENTS-DAILY PRE-TASK BRIEFING FORM


HSE DOCUMENTS-DAILY PRE-TASK BRIEFING FORM


The blog post "Daily Pre-Task Briefing Form" from HSE Documents offers a free, editable, ready-to-use form designed for health and safety professionals, project managers, HSE engineers, and supervisors. This essential tool facilitates effective daily pre-task briefings, promoting a safer work environment by ensuring task-specific hazards, control measures, and safety responsibilities are communicated to all team members before work begins. It is perfect for worldwide HSE professionals aiming to enhance site safety.


Download File Now

Friday, October 4, 2024

October 04, 2024

RESCUE IN CONFINED SPACE POWERPOINT

RESCUE IN CONFINED SPACE POWERPOINT
RESCUE IN CONFINED SPACE POWERPOINT 

1. LEARNING OBJECTIVES


1.1. List the various types of confined spaces

1.2. Understand the dangers and safety precautions in confined space rescue Able to execute the 6  methods of rescue in confined space 


2. SCOPE

2.1. Definition of Confined Space

2.2. Types of Confined Spaces

2.3. Characteristics and Hazards Associated with Confined Spaces

2.4. Rescue action plan

2.5. Emergency casualty evacuation


3. INTRODUCTION

3.1. Rescue in Confined Spaces is often challenging

3.2. Most hazardous among all rescue activities

3.3. 6 out of 10 killed are untrained

3.4. Safety of rescuers is most important (your safety)

Meet all three of the following characteristics/descriptions:

3.5. Large enough for human entry/works

3.6. Limited or restricted means for entry/exit

3.7. Not designed for continuous occupancy


4. CONFINED SPACES

EXAMPLES

4.1. Tanks

4.2. Ducts

4.3. Closed Drains & Sewers

4.4. Any closed areas like Manholes & shallow Drains, etc

4.5. Silos 

4.6. Collapsed Structures 


5. HAZARDS IN CONFINED SPACES

5.1. Hazardous Atmosphere

5.1.1. Hydrogen Sulfide

5.1.2. Carbon Monoxide

5.1.3. Explosive Atmosphere

5.1.4. Low Oxygen

5.1.5. Other Hazardous Material

5.2. Fall Risk

5.2.1. Slippery Ladders

5.2.2. Rusty, unstable Walkways

5.2.3. Mechanical Failure of Safety Equipment

5.3. Mechanical Hazards

5.3.1. Moving belts or other Machinery

5.3.2. Electrical Hazards

5.3.3. High-Pressure Pipe blowouts

5.4. Flooding or Engulfment Potential

5.4.1. Storm Sewers

5.4.2. Hoppers

5.4.3. Grain Bins


6. RESCUE ACTION PLAN

6.1. Casualty Assessment & Care

6.1.1. Approach with care 

6.1.2. If the atmosphere is safe, begin the primary assessment

6.1.3. If the atmosphere is unsafe, remove the casualty immediately / do not enter


7. EMERGENCY RESPONSE

7.1. Don’t rush in

7.2. Don’t try alone 

7.3. Call back-up

7.4. Standby team to help/assist 

7.5. Ventilate

7.6. Follow correct procedures

7.7. Stay alert and get ready to get out quickly when you notice any worrying signs


8. SAFE WORK PROCEDURES

8.1. Rescuers to standby

8.2. Maintain communications

8.3. Safety harness & safety lines

8.4. Non-sparking equipment

8.5. Proper insulation of electrical appliances

8.6. Precautions for hot works

8.7. Methods of Emergency Casualty Evacuation from Confined Spaces 

8.8. Forward Drag (Rescue Crawl or Neck Drag)

8.9. Cross Chest Method

8.10. Collar Pull

8.11. Leg Pull 

8.12. Blanket

8.13. Forward Drag or Rescue Crawl or Neck Drag - (casualty without hand injury)

8.14. Tie the casualty’s arms securely at both wrists with triangular bandages

8.15. Kneel astride

8.16. Pass your head through the casualty’s arms

8.17. Straighten your arms to lift the casualty

8.18. Drag out casualty by crawling and pushing your feet

8.19. Forward Drag or Rescue Crawl or Neck Drag - (casualty with hand injuries)

8.20. Pass belt, rope, or triangular bandage under casualty near armpits.

8.21. Kneel astride casualty

8.22. Pass loop over your head.

8.23. Straighten your arms.

8.24. Drag casualty forward by crawling and pushing your feet

8.25. Cross-Chest Method (Unconscious casualty with minor injuries

8.26. Lift casualty to the sitting position

8.27. Sit behind the casualty with both legs apart

8.28. Place casualty’s hands crossed across chest with fingers on shoulders

8.29. Insert your arm under the casualty’s armpit and hold the outer arm of the casualty   

8.30. Drag out casualty backwards


9. RESCUE USING A BLANKET

9.1. Casualty may be conscious or unconscious, with or without fracture.

9.2. Collar pull method

9.3. Employed when earlier methods cannot be used.

9.4. Casualty’s head is positioned in the direction of the exit 

9.5. Leg pull method

9.6. Last resort in very confined spaces under life-threatening situations.

9.7. The casualty’s legs are in the direction of the exit and the casualty cannot be repositioned.

9.8. Practical

9.9. Practice all 6 Rescue methods while given a scenario 


Download File Now

Saturday, August 10, 2024

August 10, 2024

LEAD – EPA’S LEAD RULES-TOOLBOX TALK


LEAD – EPA’S LEAD RULE-TOOLBOX TALK

Lead is harmful when ingested or inhaled. The permissible exposure limit is 50 µg/m3. Lead poisoning can cause developmental and behavioral problems in children and adults. No level of lead is safe, and children are an especially vulnerable population. The Environmental Protection Agency (EPA) has guidelines under the Renovation, Repair, and Painting Program to help reduce exposure to children. Renovation work may put occupants at risk of lead exposure, so the following requirements shall be followed.


EPA RULE

When working in residential houses, apartments, and child-occupied facilities built before 1978, contractors must:

⦁  Distribute the Environmental Protection Agency (EPA)’s lead hazard information pamphlet "Renovate Right" before starting renovation work.

⦁  Document compliance with this requirement; the Environmental Protection Agency (EPA)’s pre-renovation disclosure form may be used.

⦁  Prevent Exposure: use engineering controls + lead-safe work practices

Be Trained:

⦁  Company Certification

⦁  Employees trained in lead-safe work practices to minimize occupant exposure (certified renovators or on-the-job training)

When does the EPA lead rule apply?

In pre-1978 housing and any child-occupied facilities, like schools or daycare centers.

⦁  Remodeling and repair/or maintenance

⦁  Plumbing, carpentry, electrical, and painting preparation.

⦁  Window replacement and partial or full demolition

Exceptions: 

Minor repairs and maintenance that disturb 6 sq. ft. or less of paint per room inside, or 20 sq ft or less on exterior are exempt from the rule.

You should still use engineering controls and work practices to reduce lead exposure.

Prevent Exposure

The permissible exposure limit (PEL) for lead is 50 µg/m3.

Engineering controls and work practices are essential to help reduce the risk of exposure. Use isolation, ventilation, work practices, and good housekeeping and hygiene to reduce exposure levels.

Avoid:

⦁  Open flame burning or torching

⦁  Using a heat gun at temperatures more than 1100F

⦁  Sanding, grinding, planning, etc. with power tools not equipped with a shroud and HEPA vacuum attachment or using wet cutting methods.

If engineering controls are not effective or feasible, you may be required to wear a respirator. You must complete a medical questionnaire, fit test, and training before you wear a required respirator. Contact your safety coordinator with questions.

Lead Safe Work Practices

1. Contain the work area + post warning signs to prevent dust and debris from leaving the work area.

⦁  Contain the area with plastic to isolate

⦁  Cover floors and furniture that can’t be moved

⦁  Seal off doors and heating/cooling vents

2.  Use work practices that limit dust and vapor.

⦁  Use Local Exhaust Ventilation with a HEPA filter when welding/cutting or use hydraulic shears rather than cutting

Use wet methods: 

⦁  Mist the area before sanding or scraping

⦁  Score paint before separating

⦁  Pry/pull apart components rather than breaking them.

⦁  Cut on either side of lead joints, rather than cutting the joint

⦁  Use chemical strippers, power tools (needle guns), or other methods rather than burning to remove lead-based paint from surfaces.

3. Clean up thoroughly

⦁  Clean daily + clean before removing any plastic containment HEPA vacuum + wet wiping and wet mopping with plenty of rinse water.

⦁  Verify all dust and chips are gone before removing the containment area.


Download File Now

Monday, August 5, 2024

August 05, 2024

UNSAFE ACTS AND UNSAFE CONDITIONS-HSE DOCUMENTS

UNSAFE ACTS AND UNSAFE CONDITIONS-HSE DOCUMENTS

All safety professionals, today's HSE Documents is uploading a very important safety toolbox talk on two essential elements that can contribute to accidents: 

A. Unsafe acts 

B. Unsafe conditions. 

By understanding the above-mentioned factors, we can all work together to prevent them and keep ourselves and our colleagues safe.

Accidents are caused either by an unsafe act, an unsafe condition, or a combination of both. Accidents are rarely caused by a dramatic failure of equipment and are mainly caused by human failure. Even an apparent failure of equipment may be due to a common factor in failing to recognize signs of impending trouble. Analysis of accidents has shown that over 95% of accidents are caused by such human factors as failing to take proper precautions, ignoring safety regulations, or carrying out jobs incorrectly.


Examples of Unsafe Conditions

1. Oxygen Deficiency

2. Presence of toxic gases Presence of flammable gases

3. Presence of poisonous materials

4. Slippery or damaged working floor

5. Unguarded Machinery

6. Improperly guarded machinery 

7. Loose electrical connections

8. Unearthed Electrical Appliances 

9. Poor Housekeeping

10. Improper stacking of materials

11. Defective measuring instruments 

12. Defective Tools

13. Defective materials

14. Inadequate illumination


Examples of Unsafe Acts

1. Using Improper methods

2. Using improper tools and equipment 

3. Failing to use proper PPEs 

4. Operating without authority

5. Overconfidence 

6. Impulsiveness 

7. Laziness 

8. Showing off 

9. Horseplay

10. Ill health

11. Supervisory failure. I.e. poor training, lack of discipline, and poor housekeeping.

12. Unsafe behaviour Unsafe attitude

13. Lack of knowledge

14. Unsafe personal dress and accessories


Download File Now

Monday, June 3, 2024

June 03, 2024

HYDROGEN SULFIDE (SO2)-CONCENTRATION AND POTENTIAL EFFECTS-HSE DOCUMENTS


HYDROGEN SULPHIDE

HYDROGEN SULPHIDE (SO2) 

Hydrogen Sulphide (SO2) is a by-product of all petrochemical processes, sewage systems, mines, and laboratories. It is a highly toxic gas, colorless, heavier than air, flammable, explosive, and corrosive. Its odor is not a reliable warning. Up to 5 ppm, odor can distinguish its presence as a rotten egg. 

Hydrogen Sulphide (SO2) is heavier than air, therefore it accumulates in low-level areas such as excavations, trenches, and oil tanks, all are considered traps for the gas. Hydrogen Sulphide is a combustible gas. It will ignite at 4.6 to 46 % mixture with air, it gives a blue flame when ignited. When it burns, it produces a toxic gas of Sulfur dioxide (SO2). Hydrogen Sulphide (SO2) corrosion is a factor in the formation of pyrophoric materials.


CONCENTRATION AND POTENTIAL EFFECTS


Concentration: 1 PPM:  

No Significant physical effects. The sense of smell for Hydrogen Sulphide (SO2) remains intact and can detect a rotten egg odor.


Concentration: 10 PPM:

Potential Effects: Eye irritation; 10 PPM is the threshold limit value (TLV)-the greatest. Concentration is safe to breathe without respiratory protection for a normal 8-hour work day, and 40-hour work week.


Concentration: 100 PPM:

Potential Effects: Eye inflation; corneal blistering, headache; nausea; cough; and sense of smell become ineffectual within 3-15 minutes.


Concentration: 500 PPM:

Potential Effects: Respiratory disturbances cause breathing difficulties; nervous system impairment can result in tremors, numbness in extremities, and convulsions; the ability to reason is lost.


Concentration: 700 PPM:

Potential Effects: Respiratory failure; unconsciousness; seizures; Loss of bowel and bladder control; fatal in 30 minutes.


Concentration: 1000 PPM:

Potential Effects: Causes immediate unconsciousness and death within minutes.


Download File Now

Thursday, February 29, 2024

February 29, 2024

FIRE EXTINGUISHERS-HSE DOCUMENTS


FIRE EXTINGUISHERS-HSE DOCUMENTS
FIRE EXTINGUISHERS-HSE DOCUMENTS 

TOOLBOX TALKS

REMEMBER!!!

⦁  Do not store anything in front of fire extinguishers

⦁  Do not hang anything on fire extinguishers like coats

⦁  Visually inspect once per month. Ensure it is: In its designated spot, with no damage, the retainer pin is in place, and the pressure gauge is in the green.

⦁  Swap out old with new yearly at the shop (Annual inspections are completed at [HSE DOCUMENTS]’s Shop by a Licensed Inspector)


INSPECTIONS:

A.  Visual Inspections: Check monthly – in place, good condition, not used, seals intact, pressure gauge in green

B.  Annual Maintenance: Do they have a tag with month/year?

C.  Hydrostatic Testing: 5 years wet chemical, 12 years dry chemical, Retire non-chargeable extinguishers after 12 years


FIND A PROBLEM?

Return to [HSE DOCUMENTS]’s shop. A licensed inspector will be called to conduct a full maintenance inspection.

⦁  Operating instructions are not legible

⦁  Safety seals are broken or missing

⦁  Fullness can’t be confirmed (as determined by weighing or lifting)

⦁  Evidence of physical damage, corrosion, leakage, or a clogged nozzle

⦁  Pressure gauge readings are not in the operable

⦁  Evidence of use


HOW TO USE: PASS

⦁  Fire extinguishers only contain enough material to last about 10-20 seconds.

⦁  Aim at the base of the fire before you spray, and ensure you are at an appropriate distance. Too far may be ineffective and too close may cause flames to jump back at you.

⦁  After use, remove from service, and never replace a pin after removed. Pressure can slowly release


Download File Now

Sunday, February 25, 2024

February 25, 2024

SPILL PREVENTION AND RESPONSE-HSE DOCUMENTS

SPILL PREVENTION AND RESPONSE-HSE DOCUMENTS
SPILL PREVENTION AND RESPONSE DOCUMENTS


TOOLBOX TALKS

Spill Prevention + Response

Did you know it’s not technically illegal to have a hazardous spill, but it is a crime if you don’t have an effective response plan or if you fail to notify government agencies in Emergency situations or contaminated waterways. On your job site, make a plan to control potential spills. Look at the slopes, for waterways and drains, and check SDSs for chemicals on-site. Know effective response procedures and local laws.  Sediment, carwash soap, fuel leaks, and concrete washout areas are all examples of releases or spills that can affect the environment.  Always notify your supervisor if you have a spill.


Always have a plan!

1. Prevent Spills

⦁  Regularly inspect and maintain equipment

⦁  Know your chemicals, and your risk, and have effective response plans based on risk

⦁  Have a plan to catch small leaks so they can be easily contained and cleaned

⦁  Work with a hazardous waste contractor before a spill for prompt response and disposal


2. Contain

Capture, and minimize affected areas, especially liquid spills from entering drains, waterways, and wetlands. A shovel is your best tool!

Block access to drains and waterways

⦁  Make damns or ditches to trap, block or divert liquid spills away from drains and waterways

⦁  Use socks or berms to block or divert spills

⦁  If spills enter a drain, is the material fully contained within the catch basin, and can it be safely removed?

Absorb it! (Easier to control + clean up)

⦁  Take absorbent pads, pillows, socks, etc. to contain smaller spills

⦁  Use loose fill absorbents or regular kitty litter to absorb liquids

⦁  Mix with dirt! Yes, take a shovel and just start mixing soil with the spill to prevent downhill. It’s cheaper to clean up and dispose of contaminated soil than to clean up miles of a watershed


3. Clean up Spills

⦁  Call in a specialist to help with waterways or large spills.

⦁  Mark any contaminated ground with white spray paint and take photos throughout to show cleanup progress

⦁  Place contaminated absorbents in hazmat buckets and call for disposal

⦁  Call in the experts to clean, absorb, excavate, and dispose of contaminated material.

Report hazardous releases/spills that pollute ANY water body, sewer, or drains, are large reportable quantities or large spill areas, are life-threatening, pose an imminent danger, are highly flammable, or require area evacuation.  Report to [HSE DOCUMENTS], then to the SPILL CONTROL AUTHORITY FOR YOUR STATE OR COUNTRY: 000-000-0000


REMEMBER!!!

⦁  Do not store anything in front of fire extinguishers 

⦁  Do not hang anything on fire extinguishers like coats

⦁  Visually inspect once per month. Ensure it is: In its designated spot, with no damage, the retainer pin is in place, and the pressure gauge is in the green.

⦁  Swap out old with new yearly at the shop (Annual inspections are completed at [HSE DOCUMENTS]’s Shop by a Licensed Inspector)


Download File Now

Sunday, December 24, 2023

December 24, 2023

HSE DOCUMENTS-COLD STRESS-TOOLBOX TALKS


HSE DOCUMENTS-COLD STRESS-TOOLBOX TALKS


1.0. HYPOTHERMIA

When exposed to cold temperatures, your body begins to lose heat faster than it can be produced. Prolonged exposure to cold will eventually use up your body’s stored energy. The result is hypothermia, or abnormally low body temperature. A body temperature that is too low affects the brain, making the victim unable to think clearly or move well. This makes hypothermia particularly dangerous because a person may not know it is happening and will not be able to do anything about it.


2.0. SYMPTOMS 

Symptoms of hypothermia can vary depending on how long you have been exposed to the cold temperatures.

2.1. Early Symptoms

Shivering

Fatigue

Loss of coordination

Confusion and disorientation

2.2. Late Symptoms

No shivering

Blue skin

Dilated pupils

Slowed pulse and breathing

Loss of consciousness


3.0. FIRST AID 

Take the following steps to treat a worker with hypothermia:

3.1. Alert the supervisor and request medical assistance.

3.2. Move the victim into a warm room or shelter.

3.3. Remove their wet clothing.

3.4. Warm the center of their body first-chest, neck, head, and groin-using an electric blanket, if available; or use skin-to-skin contact under loose, dry layers of blankets, clothing, towels, or sheets.

3.5. Warm beverages may help increase the body temperature, but do not give alcoholic beverages. Do not try to give beverages to an unconscious person.

3.6. After their body temperature has increased, keep the victim dry and wrapped in a warm blanket, including the head and neck.

3.7. If victim has no pulse, begin cardiopulmonary resuscitation (CPR).


4.0. FROSTBITE 

4.1. Frostbite is an injury to the body that is caused by freezing. 

4.2. Frostbite causes a loss of feeling and color in the affected areas. It most often affects the nose, ears, cheeks, chin, fingers, or toes.

4.3. Frostbite can permanently damage body tissues, and severe cases can lead to amputation. 

4.4. In extremely cold temperatures, the risk of frostbite is increased in workers with reduced blood circulation and among workers who are not dressed properly.


5.0. SYMPTOMS 

Symptoms of frostbite include:

5.1. Reduced blood flow to hands and feet (fingers or toes can freeze)

5.2. Numbness

5.3. Tingling or stinging

5.4. Aching

5.5. Bluish or pail, waxy skin


6.0. FIRST AID 

Workers suffering from frostbite should:

6.1. Get into a warm room ASAP

6.2. Do not walk on frostbitten feet or toes- this increases the damage.

6.3. Immerse the affected area in warm-not hot-water (the temperature should be comfortable to the touch for unaffected parts of the body).

6.4. Warm the affected area using body heat; for example, the heat of an armpit can be used to warm frostbitten fingers.

6.5. Do not rub or massage the frostbitten area; doing so may cause more damage.

6.6. Do not use a heating pad, heat lamp, or the heat of a stove, fireplace, or radiator for warming. Affected areas are numb and can be easily burned.


Download File Now

Saturday, November 25, 2023

November 25, 2023

HSE DOCUMENTS-EMERGENCIES, INCIDENTS AND INJURIES-TOOLBOX TALKS


HSE DOCUMENTS-EMERGENCIES, INCIDENTS AND INJURIES-TOOLBOX TALKS


1.0. THE MOST IMPORTANT FOR EACH JOB:

1.1. Identify the nearest clinic or hospital

1.2. Locate emergency exit routes + refresh if changed

1.3. Know where your meeting spot is

1.4. Know who to call in emergencies


2.0. CHECK WHERE IS YOU’RE:

2.1. Emergency exit route?

2.2. Nearest clinic?

2.3. First aid kit and eyewash?

2.4. Fire Extinguishers?

2.5. Do you know who is trained in first aid and CPR?


3.0. REPORT ALL INJURIES, AND INCIDENTS TO YOUR SUPERVISOR!

3.1. Report ASAP, even if you don’t go to a clinic.

3.2. Every injury, incident, or near miss gives a clue about how we can make improvements and prevent future injuries, so reporting seemingly insignificant things is essential!

3.3. Keep an eye out for your co-workers, especially during severe weather and strenuous activities.  

3.4. Note: If there is reasonable suspicion that an injury resulted from the use of drugs or alcohol, a drug and alcohol test may be required. Contact the office or safety coordinator for details.


4.0. MINOR INJURIES (FIRST AID ONLY)

4.1. Treat Injury with first aid and notify the supervisor.

4.2. Notify the safety coordinator of the injury

4.3. Keep an eye on injury and use triple antibiotics to prevent infection.


5.0. CLINIC VISIT/URGENT CARE OR EMERGENCY ROOM

Seek Medical Attention: Go to the nearest clinic or Urgent Care.  Not sure? Call the clinic/Medical center to speak to a nurse.

5.1. MOH or Urgent Care: 

Muscle injuries, debris in the eye, non-severe cuts/abrasions.

Occupational clinics know more about your job and common workplace injuries compared to urgent care. 

MOH clinics and urgent care are faster than ERs.

5.2. ER:  

Severe Injuries needing immediate attention, or after hours. Drive injured person if objects in the eye, excessive bleeding, exposure to chemicals, etc.


6.0. SEVERE OR LIFE-THREATENING: 

(Employee is unconscious, cannot be moved, or is bleeding profusely)

6.1. Call 911/999, etc.

6.2. Make sure the scene is safe + and check an injured person

6.3. Get help from a trained first aid provider. 

6.4. Perform first aid: Stop bleeding, perform CPR, and get AED.

6.5. Stay with the injured person until help arrives.

6.6. Accompany the injured person to the hospital and contact management and safety with updates.

Note: if a severe incident occurs, never post information online, speak to reporters, or provide information to others outside the company. [HSE DOCUMENTS] will designate representatives to communicate information to the public.


Download File Now

Wednesday, November 22, 2023

November 22, 2023

HSE DOCUMENTS-SITE RESCUE PLAN-TOOLBOX TALKS


HSE DOCUMENTS-SITE RESCUE PLAN-TOOLBOX TALKS


Table of Contents


1.0. Introduction

2.0. Objective

3.0. Key Components of a Site Rescue Plan

3.1. Emergency Contact Information

4.0. Site-Specific Hazards

5.0. Communication Protocols

6.0. Training and Awareness

7.0. Rescue Equipment

8.0. Roles and Responsibilities

9.0. Procedures

9.1. Raise the Alarm

9.2. Assessment and Communication

9.3. Evacuation and Assembly Points

9.4. First Aid and Initial Response

9.5. Site Shutdown

9.6. Conclusion


1.0. Introduction

Good day, everyone. Today's toolbox talk is focused on a topic that is of utmost importance to our collective safety on the construction site – the Site Rescue Plan. Accidents can happen, and having a well-thought-out rescue plan can make all the difference in ensuring the well-being of our team members in case of an emergency.


2.0. Objective

The objective of today's discussion is to raise awareness about the importance of having a comprehensive Site Rescue Plan in place. We'll discuss the key components and procedures to follow to ensure a prompt and effective response to emergencies.


3.0. Key Components of a Site Rescue Plan

3.1. Emergency Contact Information

Ensure everyone on the site has access to a list of emergency contact numbers, including local emergency services, medical facilities, and any designated on-site emergency contacts.


4.0. Site-Specific Hazards

Identify and understand the specific hazards on our site. This includes potential risks related to the nature of the construction, machinery, and environmental conditions.


5.0. Communication Protocols

Establish clear communication protocols, including designated meeting points, radio channels, and procedures for alerting the entire team in case of an emergency.


6.0. Training and Awareness

Ensure that all team members are trained on emergency response procedures. Regular drills and training sessions should be conducted to keep everyone prepared.


7.0. Rescue Equipment

Identify and maintain the necessary rescue equipment on-site, such as first aid kits, stretchers, and any specialized equipment required for unique hazards.


8.0. Roles and Responsibilities

Clearly define the roles and responsibilities of team members in the event of an emergency. This includes designating first aiders, rescue team members, and individuals responsible for calling emergency services.


9.0. Procedures

9.1. Raise the Alarm

If you witness or are aware of an emergency, immediately raise the alarm using the designated communication method.

9.2. Assessment and Communication

Assess the situation, communicate the nature of the emergency, and provide clear and concise information to emergency services if required.

9.3. Evacuation and Assembly Points

If evacuation is necessary, follow designated evacuation routes and assemble at predetermined assembly points. Do not re-enter the site until it is declared safe to do so.

9.4. First Aid and Initial Response

Provide first aid to the injured while awaiting professional medical assistance. Ensure that those with first aid training take charge until emergency services arrive.

9.5. Site Shutdown

If necessary, shut down any site operations that may pose a risk during the rescue operation.

9.6. Conclusion

Remember, a well-prepared Site Rescue Plan is not just a document; it's a set of procedures that can save lives in the event of an emergency. Stay informed, be vigilant, and ensure that everyone on the site is familiar with the plan. Safety is a team effort, and together we can create a secure working environment for everyone.


Thank you for your attention, and let's prioritize safety on our construction site.


Download File Now