TOTAL FREE HEALTH AND SAFETY DOCUMENTS DOWNLOADING SOURCE


Breaking

Friday, March 25, 2022

March 25, 2022

METHOD STATEMENT FOR INSTALLATION OF LIGHT FITTINGS LUMINARY’S EXTERIOR INTERIOR

Method Statement For Installation Of Light Fittings Luminary’s Exterior Interior


To download the following Method Statement For Installation Of Light Fittings Luminary’s Exterior Interior in free and editable MS Word format, click on the download link given at the end of this article.

1. Purpose


The purpose of this Method Statement for Installation of light fittings luminary’s exterior interior” to ensure that it complies to Project requirements, specifications, and standards.


2. Scope of Work

This Method Statement applies to all installation of light fittings luminary’s exterior interior. The Manpower, devices, machinery, and equipment shall be organized to meet the schedule as per the approved construction program. 


3. Definition

1.1 Abbreviation

QAQC  Quality Assurance Quality Control

MS Method Statement 

MEP Mechanical, Electrical, Plumbing

RFIA Request for Inspection & Approval

MIR Materials Inspection Request

ITP Inspection and Test Plan

TBT Tool Box Talk

1.2 “Approved” or “Approval” 

“Approved” or “Approvals” means approved in writing by the applicable Engineers         Assistant acting within the scope of their delegated authority.

1.3 “Shop Drawings” 

“Shop Drawings” means drawings produced where the contract designs drawings require expressing in more basic form to facilitate construction scope and requirements.

1.4 “Final Inspection”

“Final Inspection” means the inspection of the records of works at completion or after pre-determined elements to ensure that all previous inspections and tests have been satisfactorily carried out and properly recorded.

1.5 “Materials”

“Materials” means all items covering the materials or equipment delivered to the site that must be incorporated in the project.

1.6 “Method Statements”

“Method Statements” means a technical document to be read in conjunction with the drawings, specification, standards, and codes of practice, technical datasheets, schedules, work instructions, and any other technical document related to a particular work.


4. Reference Documents – Specifications, Drawings. Etc.

1. Project Quality Plan 

2. Project General Specifications

3. Approved Project Electrical Drawings 

4. Approved Method Statements 

5. Approved Material Submittal 

6. Manufacturer’s Instructions

Following tools shall be required for the installation of light fittings & fixtures.

1. Portable hand tools.

2. Portable Drilling Machine

3. Spirit Level

4. Level Threads

5. Step Ladder / Scaffolding

6. Digital Multimeter

5. Manpower

Staff:

1. Construction Manager

2. Site Engineer

3. Supervisor

4.QC Engineer / Inspector

5. Quantity Surveyor

6. Safety Officer

Labour

1. Foreman

2. Trade workers

3. Helpers / Labours

4. Drivers


5. Responsible Personnel on Site

1. The Project Manager shall be responsible for the overall construction activities.

2. The Construction Manager, Testing & Commissioning Engineers, Site Engineers, Supervisors, and Foremen shall implement this Method Statement.

3. The Material controller shall be responsible for receiving materials in the on-site warehouse.

4. The site Engineer / Supervisor shall check the materials as per the manufacturer’s recommendation before installation and shall be responsible for the installation as per approved shop drawings.

5. Safety Officer shall ensure that appropriate/necessary measures are in place at the work location to avoid any unexpected events.

6. QAQC Inspector shall be responsible for carrying out inspections for the materials delivered on-site. He shall document such inspections.

7. QAQC Engineer / Inspector shall monitor the installation activities progressively and shall record all deviation from the specification in a form of snags or further as non-conformance notification.


6. Material Inspection / Storage

All materials and/or equipment received or purchased shall be inspected and approved by Supervision Consultant before using on-site. Materials shall be stored in a safe, secured, and tidy manner inappropriate conditions to prevent deterioration or damage. All major MEP equipment shall be appropriately covered and protected from weathering ill effects, open sunshine, sand storm, and other such vagaries peculiar to the region. Items shall be stored for ease of access/handling/stock verification/ inspection/ checking by the main contractor/supervision consultant representative if and when required.

The manufacturer’s recommendation for storage criteria should be followed where applicable to avoid damage to product quality. The storage areas shall be laid out to ensure ease of handling, retrieval and to avoid damage to materials which must be properly stacked following the manufacturer’s recommendation. The storekeeper shall ensure that the rotation of materials is maintained to ensure that the “first in, first out” system is observed. Routine checks shall be carried out to ensure that this rotation is maintained. The shelf life of the materials shall be monitored where applicable.  


7. MATERIALS

The Installation of light fittings luminary’s exterior interior accessories shall be in line with the approved material submittal and approved drawings as per rules and standards.


8. HANDLING & STORAGE

On receipt of the Lighting Control System accessories at the site, necessary precautions shall be taken for unloading, shifting & storage, as follows: -

1. All Packages for the complete set of Lighting Control systems, reaching the site shall be identified as per the package list.

2. Where auxiliaries are shipped loose, these will be identified and checked against the dispatch documents. Any missing or damaged item will be recorded to the supplier immediately for replacement/repair.

3. All materials received at site shall be inspected and ensured that the materials are as per approved material submittal, shop drawing, and single line diagram.

4. Any deterioration, damage, etc if found will be notified and reported for further necessary action.

5. The site Engineer (Electrical) has to ensure that material used at the site is free from any damage.

6. All packages shall be stored under a protected dust area.


9. Installation General Requirements

1. The site Engineer (Electrical) has to ensure that all wiring is completed and tested and the site is cleared from the civil section to install light fittings and all cement works and coloring of the wall is completed and cleared for the installation of wiring accessories.

2. Before starting the installation, the Site Engineer (Electrical) should ensure that approved shop drawings related to the installation area are referred and that required materials are available at the site as per approved material submittals.


10. INSTALLATION PROCEDURE GENERAL FOR INSTALLATION OF LIGHT FITTINGS LUMINARY’S EXTERIOR INTERIOR

1. Installation works shall be carried out only concerning approved shop drawings of the latest revision.

2. The site Engineer (Electrical) has to ensure that all the lighting fixtures are received at the site of the latest revision.

3. The site Engineer (Electrical) has to ensure that all the lighting fixtures are received at the site as per approved material submittal and as per approval.

4. Ensure all finishing works in all related areas are completed for the area of installation and released/cleared by the civil section to proceed with the installation of lighting fixtures.

5. The type of lighting fixtures is to be selected as per the approved schedule of lighting and approved shop drawing.

6. Lighting fixtures installed in exposed external areas shall be of weatherproof type.

7. Lighting fixtures are to be installed inline and parallel with another line of fixtures as per approved shop drawings and false ceiling drawings.

8. Heavy lighting fixtures shall be supported from the ceiling using galvanized caddy clips and heavy gauge G.I. wire.

9. Lighting fixtures fixed in service areas, where there is no false ceiling, fittings are to be fixed firmly and securely using anchor bolts. minimum 6 millimeters bolt and metal expansion anchor rods.

10. Fixing of lighting fixtures above ducts, pipes, trays, and trunking shall be avoided.

11. The connection between lighting fixtures and ceiling roses is to be made only using heat resistance 3 core, 2.5 SQ mm, or 1.5 SQ mm flexible / wires. wires.

12. Ceiling rose location shall be easily accessible and should be avoided installation above AC ducts and cable trays.

13. All lighting fixtures shall be connected with earthing cable.

14. Before fixing lamps, all lighting fixtures are to be cleaned.

15. Gloves shall be used in works.

16. Correct lamps are to be fixed in lighting fixtures.

17. Installation of louvers shall be installed and protected by polyethylene sheets.

18. Care should be taken in fixing the fitting louvers and avoiding fingerprints or dust on the louver

19. Before installation all wires should be tested, meagered and schedules should be submitted to Engineers for approval and records shall be maintained.

20. GI boxes, round PVC boxes in concrete must be treated after plaster and the edges shall be accomplished well and clean. 

21. Wall finish shall be done uniformly around the box edges.

22. Test results should be submitted to the consultant for the records.

23. Ensure that where luminaries are fixed directly to conduit boxes the final circuit connections are adequately protected against the heat transfer from the luminaries

24. Fix a label at each luminary which is connected to more than one circuit to read this luminary is connected to 'X' number of circuits and is supplied from distribution board Ref. 'Y'. Isolate each circuit before working on the luminaire. Agree on label location and format on site.


11. INSPECTION

Inspection for Installation of installation of light fittings luminary’s exterior interior”.


12. ATTACHMENTS

1. Risk Assessment

2. Inspection &Test Plan

3. Quality Control Procedure.


DOWNLOAD THE FILE


Sunday, March 13, 2022

March 13, 2022

Portable Fire Extinguishers-Toolbox "PASS" Talks

To download occupational health safety and environmental free documents in editable format; visit our blog at hsedocuments.com; where you can download all free content. Following are key points taken from the original "Portable Fire Extinguishers-Toolbox Talks-PASS" file:

The control of any accidental fire eruption due to any reason within the facility, the proper knowledge for the portable fire extinguisher’s maintenance, easy availability, and usage play a vital role. The staff, employees must fully be trained for its proper use in the event of any unwanted fire incident. For this reason, fire extinguisher training is very important from time to time repeatedly. Such things are important enough to need repeating. Earlier this month you were given the proper instructions on how to use a portable fire extinguisher.

All the person staff, employees, or fire control supporting personnel should make sure to remember the PASS operating technique for portable fire extinguishers. 

What Word does “PASS” stands for?

P - Pull the pin. 

Pulling the pin unlocks the operating lever or button so you can discharge the Portable fire extinguisher easily. While using the fire extinguisher, always stand at least 6 to 8 feet from the fire.

A - Aim low 

Always point the portable fire extinguisher nozzle or hose at the base of the fire.

S- Squeeze the lever below the handle. 

Squeezing the Portable Fire Extinguisher’s lever discharges/releases the contents/chemical of the portable fire extinguisher. When the user of the fire extinguisher releases the lever, the discharge or release of the content or chemical stops. Some models of portable fire extinguishers have a button to press rather than a lever.

S - Sweep 

Moving carefully and safely toward the fire, always keep the portable fire extinguisher aimed at the base of the fire and sweep from side to side until the flames appear to be out.

Watch and examine the area. If the fire starts up again, repeat the Portable fire extinguisher “PASS” technique.

Portable Fire Extinguishers-Toolbox "PASS" Talks


DOWNLOAD THE FILE HER

Saturday, March 5, 2022

March 05, 2022

Confined Space Entry Training-PPT

What is the Objective of this Training PPT?

Company/Organization require that all employees who must enter into confined spaces receive training as to the hazards, procedures and equipment required to do so safely.

Definitions:

The entrant is the man who enters a confined space. The attendant is the man who stays with the entrant external to the confined space and is accountable for helping the entrant existing to the confined space and calling for emergency assistance when needed.

The health and safety representative is the qualified and competent personnel who evaluates the hazards, defines required devices, equipment and precautions and release/issue the Confined Space Entry Permit.

Goals and Objectives:

At the end of this confined space entry training session, you will:

  1. Be familiar with the hazards and requirements of “safe” confined space entry.
  2. Pass a 10-question quiz with a score of 100%.

Confined Space Entry - Hazards

  1. Both animal and plant life need Oxygen (O2) to survive. One of the basic hazards of entering confined spaces is oxygen deficiency.
  2. When oxygen (O2) is present in concentrations less than 19.5% the atmosphere is said to be Oxygen(O2) deficient.
  3. Oxygen(O2) can also be present in concentrations that are too high.
  4. Oxygen (O2) in concentrations greater than 23% is too oxygen-rich and can cause combustible materials to ignite very quickly.

Oxygen (O2) deficiency can be caused by several processes:

Consumption: 

Oxygen(O2) is used up by the person who is in the confined space and turned into carbon dioxide.

Displacement:

Denser materials push Oxygen (O2) out of the occupied space.

Reaction:

Oxygen(O2) is reacted with other materials to make other compounds.

Carbon Dioxide (CO2)

After Oxygen(O2) is delivered to body organs and used by organ cells, it reacts with carbon to make Carbon Dioxide (CO2). Red blood cells carrying Carbon dioxide (CO2) turn blue. Carbon dioxide (CO2) is supplied back to the human/animal’s lungs by the red blood cells and discharged into the surrounding atmosphere. 

Oxygen (O2) 

The human body needs oxygen (O2) to carry out cellular metabolism. Oxygen (O2) is brought in through the lungs and transported to cells of human body organs by the red blood cells. When blood is rich in Oxygen (O2)  it turns red.

Given a fixed amount of oxygen as you would have in a confined space, the respiration of oxygen causes Carbon dioxide (CO2) to increase. When Oxygen(O2) decreases to less than 19.5%. the atmosphere is said to be Oxygen (O2) -deficient, putting occupants of the confined space at risk of losing consciousness and death.

Confined Space Entry Training-PPT 


To download the complete PPT file, click on the download link below:


DOWNLOAD THE FILE
Confined Space Entry Training-PPT 

Friday, March 4, 2022

March 04, 2022

MOBILE CRANE LIFT PLANNING SHEET

To download the complete editable, ready-to-use file for the mobile crane lift planning sheet, click on the link given at the end of the post.

1. CRANE DATA

  1. Crane Reg. No.
  2. Inspection Date
  3. Next due date
  4. Crane capacity
  5. Max working radius
  6. Max boom length
  7. Max lifting height
  8. Parts of line

2. LOAD DATA

  1. Object to be lifted
  2. Weight of Load
  3. Container 
  4. Awkward Shape
  5. COG Known, could it change
  6. Certified lifting points
  7. Special Rigging required
  8. Special rigging techniques required
  9. Other: Chain block used to balance

HAZARDS CRANE SET-UP/OPERATING AREA

7.1 Underground Hazards

  • Utilities – Gas, Water etc.
  • Storm Drain                 
  • Sewer                     
  • Recent excavations 
  • Other - describe 

7.2 Ground level Hazards

  • Members of the public 
  • Workers
  • Vehicles/machinery
  • Buildings
  • Ground conditions     
  • Other - describe 

7.3 Above ground Hazards

  • Electrical cables
  • Telephone cables
  • Lampposts
  • Other cranes
  • Trees
  • Conflicting tasks in the area
  • Other - describe 

Access road: Concrete/Bitumen/Gravel/soft/Other
Crane Set-Up Area: Concrete/Bitumen/Gravel/Soft/Slope /Other

The lifting interest calls for the following to be taken into consideration, be aware this list isn't always exhaustive.

  1. Cultural, communication and language difficulties
  2. Weight, size, shape and centre of gravity of the load
  3. Availability of approved lifting points on the load
  4. Method of slinging/attaching/detaching the load
  5. Overturning/load integrity/need for tag lines
  6. Initial and final load positions and how it will get there
  7. Lifting over live plant/equipment
  8. Number and duration of lift(s)
  9. Environmental conditions including weather and permissible limits
  10. Illumination in the pick-up and lay-down areas
  11. The proximity of hazards, obstructions in the path of the load 
  12. Contingency plan in case the task changes
  13. Access and emergency escape routes 
  14. Experience, competence and training of personnel
  15. Number of personnel required for the task
  16. Pre-Use Inspection of equipment by Operator
  17. PTW, Tool Box Talk, including Safety and Stopping the job


MOBILE CRANE LIFT PLANNING SHEET


Download The File

MOBILE CRANE LIFT PLANNING SHEET 


Wednesday, February 23, 2022

February 23, 2022

FIRE PUMP INSPECTION CHECKLIST

To download various free and editable, ready-to-use HSE documents, visit our site at hsedocuments. Following are some of the main points taken from the FIRE PUMP INSPECTION's checklist original file. and to download the editable word format file, click the download link given at the end of these points:

Fire pumps are an integral part of various water-based fire protection systems. The right design. installation. The acceptance testing of this pump will help ensure that they are ready to protect the building on the day of the acceptance test. After those keys are handed over to the building owner. there is no guarantee that the pump will remain in a ready state to work as designed unless undergoes routine inspection testing and maintenance. This checklist of Water-Based Fire Protection Systems covers just one aspect of an inspection testing and maintenance program in weekly inspections. 

For more information on fire pumps and others, kindly visit the NFPA products and solutions web portals.

A- Pump House

  1. Heat in pump room is 40-°F (4 °C) or higher
  2. Ventilation louvres are free to operate
  3. A coupling guard is in place
  4. Heat in pump room is not less than 70°F (21°C) for diesel engine pump without engine heater

B- Pump Systems

  1. Pump suction discharge and bypass valves are open appropriately.
  2. No piping or hoses leaks
  3. Fire pump leaking a single drop of water per second at seals
  4. Suction line pressure is within an acceptable range
  5. System line pressure is within an acceptable range
  6. The suction reservoir is full
  7. Wet pit suction screens ate unobstructed and in place

C- Electrical Systems

  1. The Controller Pilot light (Power on) is illuminated accordingly.
  2. Transfer switch normal power light is illuminated
  3. Isolating switch for standby power is closed
  4. The reverse-phase alarm light is not illuminated
  5. Normal Phase rotation light is illuminated
  6. Oil level in the vertical motor sight glass is within an acceptable range
  7. The pressure maintenance (jockey) pump has power.

D- Diesel Engine Systems

  1. The diesel fuel tank is at least two thirds full
  2. The controller selector switch is in the auto position
  3. voltage readings or batteries (2) are within an acceptable range
  4. Charging current readings are within the acceptable range for batteries


 FIRE PUMP INSPECTION CHECKLIST


DOWNLOAD THE FILE
FIRE PUMP INSPECTION CHECKLIST 

Saturday, January 15, 2022

January 15, 2022

Health And Safety Precautions Every Business Should Take

Almost in every business including industrial, manufacturing, oil and gas, facility management, and many more sectors, health and safety for the employees, visitors and environment is essential. here you will find some important information regarding your business and worksite. To download health and safety documents in an editable and ready-to-use format, just keep visiting hsedocuments frequently.

There are many health and safety regulations that businesses must abide by to ensure they are providing a safe working environment for their employees. Here are some of the health and safety precautions that every worksite or business should take.

By law, any worksite premises must have adequate fire escapes and staff need to know which actions to take in the event of a fire, including where the fire assembly point is. In terms of prevention, anything that could be a fire hazard should be established and precautions are taken where necessary and where possible to limit the chances of a fire.

In case there is a fire problem fire extinguishers and fire blankets should be available and staff should be shown how to use them. Some members of staff should be trained in basic first aid so they can take necessary actions where required. These staff members should be specified as first aiders and can then administer aid when there is a need for it. First aid kits should be provided, with the number and location of these depending on the size of the premises.

Everyone should be told where they are. Equipment used by staff must be safe for its intended use and important that equipment be tested regularly. PAT testing is one way of testing electrical appliances. Items are tested and then given a pass or fail sticker accordingly. There are no specific laws regarding the regularity of PAT testing, but this should be done at least once a year. Where accidents do occur, they should be recorded, whether they were avoidable or not, and whether the business was at fault or not.

This is usually done in the form of an accident book. Accidents can then be reviewed from time to time, patterns established, and actions are taken to prevent regular or unnecessary occurrences. It is unacceptable for safety to be at risk due to employees not having the required equipment. If something is required to do the job, then it must be provided with employees trained on how to use it safely.

Any equipment that is not deemed safe for use must be taken out of action immediately before an accident, not in response to an accident. Potentially dangerous equipment should only be used with caution and only when required. Where this is the case precautions must be taken; staff need to be trained to use it adequately and protective clothing must be worn where relevant, for example, goggles and safety helmets.

Warning signs should be utilized wherever there is a safety risk so it is clear what people should and shouldn’t do and where dangers may present themselves. Training needs to be provided for anything that employees need to do to carry out their job in a safe manner.

Typical examples include training how to lift to avoid injury and how to sit correctly at a desk. These are just some of the more basic precautions and regulations businesses should take. There will be other health and safety issues in addition to these, with the specifics varying from industry to industry. 

Health And Safety Precautions for Every Business 

Download File 

Wednesday, January 5, 2022

January 05, 2022

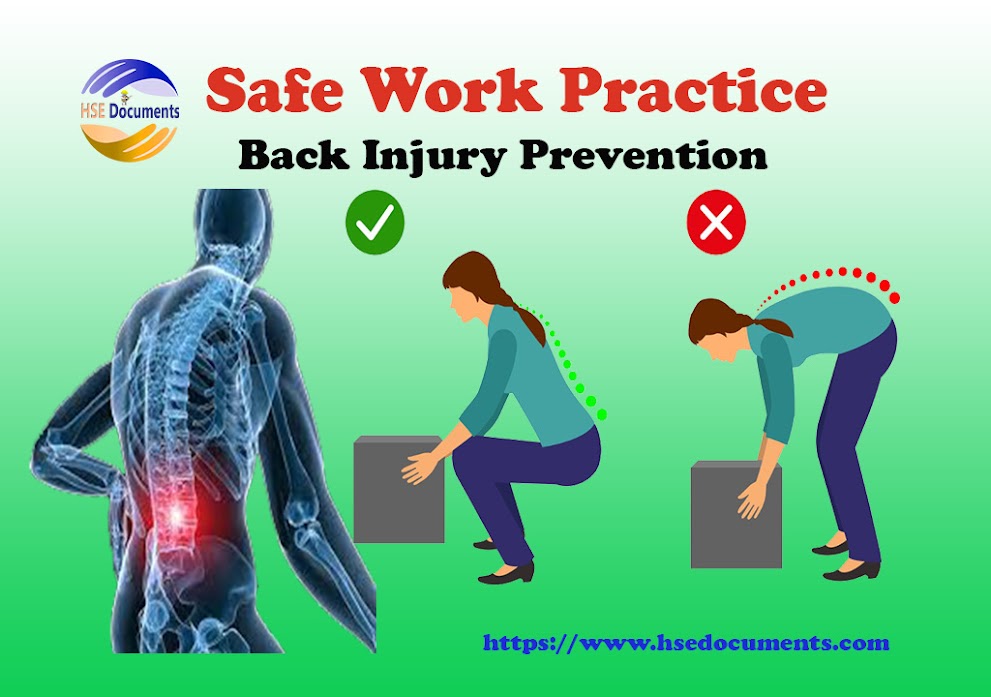
Back Injury Prevention Safe Work Practice

Back Injury Prevention

1-Hazards Present

  1. Manual Lifting
  2. Awkward Work Spaces
  3. Repeated Movements
  4. Repetitive Handling of Materials

2-PPE or Devises Required

  •  Steel toed boots
  • High visibility vest
  • Hard Hat
  • Safety Eyewear
  • Gloves

3-Additional Training / PPE Required

Stretching Exercises (Before and during work

4-Safe Work Practices

  1. Eliminate heavy lifting and/or reduce the weight of material to be handled. Use mechanical means if possible.
  2. Assign 2 or more people to assist lift if needed.
  3. 3Reduce horizontal and vertical distances of lifts.
  4. Try not to twist back when lifting to avoid injury.
  5. Stretch before each shift and after breaks to get muscles warmed-up.
  6. Change the shape of the load so it can be handled closer to the body.
  7. Make sure an essential and proper work / rest schedule.
  8. Use the following techniques to prevent painful and potentially serious injuries:
  9. Prepare to lift by warming up the muscles
  10. Test the load
  11. Plan the move
  12. While manual lifting, always use a wide, balanced stance with one foot ahead of the other
  13. Grip the load firmly
  14.  Bend your knees
  15. Bring the object as close to your body as possible
  16. Tighten your stomach muscles as the lift begins
  17. Keep your head and shoulders upright
  18. Lift with your legs
  19. Set the load down carefully

https://www.hsedocuments.com/

Download File
Back Injury Prevention Safe Work Practice

Tuesday, December 28, 2021

December 28, 2021

Supported Type Scaffold Safety

An Overview of Scaffold Safety

What Topics to be Covered in the Attached Training  PowerPoint File:

Scaffold hazards

  • Duties of a “competent person”
  • Basic scaffold requirements
  • Fall protection and guardrails
  • Employee training
  • Hazards of Scaffold Work

According to the Scaffold Industry Association (SIA), the five most serious & fatal scaffold hazards are:

  1. Falls
  2. Unsafe access
  3. Falling objects
  4. Electrocution
  5. Scaffold collapse
  6. Falls, scaffold collapse and electrocution account for most scaffold related fatalities.
  7. A combination of regular inspection and consistent training of workers can go a long way to reducing these risks.

Supported Type Scaffold Safety

To download the complete editable file, click on the following download link:

Download File 

Supported Type Scaffold Safety

Monday, December 27, 2021

December 27, 2021

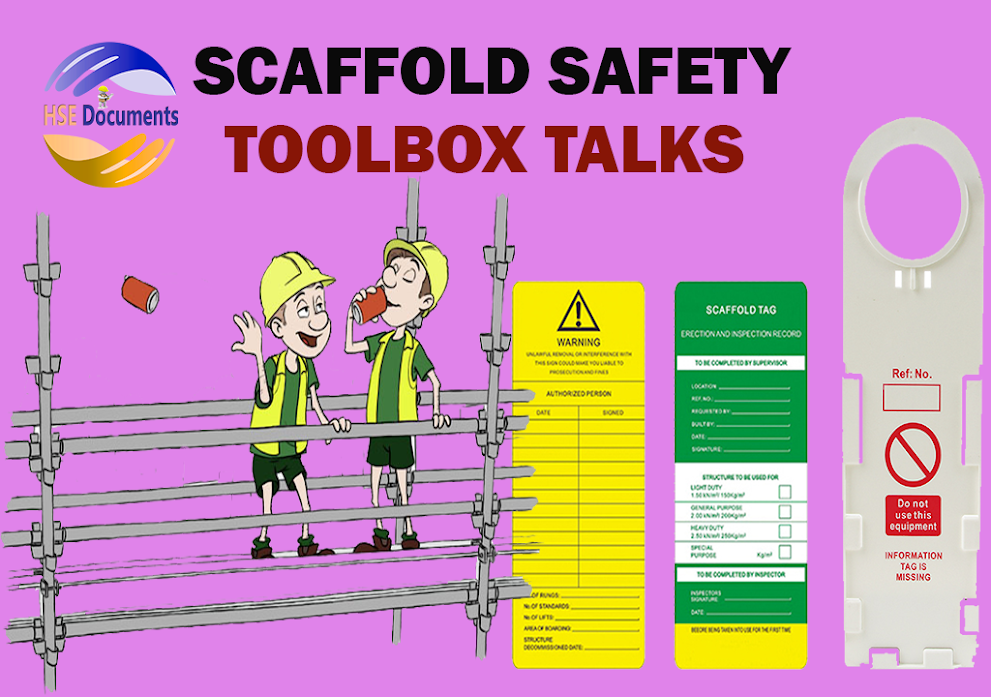
Scaffold Safety Toolbox Talks

Construction Slip, Trip and Fall Prevention

Scaffolds can tip over; fall apart or personnel can fall through improper planking. Employees or workers at the site must recognize risks while setting up, using and taking down scaffolds. Review and communicate this safety document with your employees.

  1. Use guardrails or non-public fall arrest systems whilst scaffold work platforms exceed 10 feet in height.
  2. Working structures and decks need to be fully planked without an extra than a 14-inch hole from the constructing or wall.
  3. Scaffold planks are to be overlapped on a support at least six inches however no longer extra than 12 inches.
  4. Do not use planking with knots, holes, cracks or rot.
  5. Inspect scaffolds and scaffold elements each day before and after every work shift.
  6. Check footings to see if they are stage, sound, rigid, and capable of supporting the loaded scaffold. Use materials as a guardrail further to scaffold X-frames.
  7. Make sure that tools and materials are at least 10 ft faraway from energized power lines.
  8. Contact your nearby electric employer for guidance whilst working near electricity strains.
  9. Check metal additives for bends, cracks, holes, rust, welding splatter, pits, damaged welds and non-like-minded elements.
  10. Tie the scaffold again to the building at every 20 toes of vertical top.
  11. Do now not use scaffold end frames and legs without base plates.
  12. Scaffold base plates have to be nailed to mudsills on a company basis to save you shifting.
  13. Never set up cease frames on concrete blocks or stacks of lumber as they may be unstable.
  14. Provide an amazing direction for drainage so water does no longer damage the scaffold footing.

Scaffold Safety Toolbox Talks 

Download File Here 

Scaffold Safety Toolbox Talks 

December 27, 2021

Safety Management System Awareness Communication Training Session-ppt

Download short version of |"Safety Management System Awareness Training Session-ppt ",  At the  DOWNLOAD link given at the end of the following points:

Safety Management System is A pro-lively, threat based technique to managing safety in the course of an agency. An Safety Management System affords a scientific and technical manner to perceive dangers and control risks whilst maintaining warranty that these chance controls are effective.

1- KISS Method of  A Safety Management System

Four key elements:

  1. Safety Policy
  2. Risk Management
  3. Safety Assurance
  4. Safety Promotion

2-Safety Policy

Forms Top management’s commitment to frequently and continually enhance awareness and improve safety; defines the methods, processes and  organizational  structure required  to meet safety  pre set goals.

3-Safety Assurance

Evaluates the continued effectiveness of implemented danger manage techniques; supports the identification of new risks. 

4-Safety Risk  

Management Determines the  need for and  adequacy of, new or  revised risk controls based on the assessment of acceptable risk. 

5-Safety Promotion 

Includes training, communique and other movements to create a high-quality safety culture inside all levels of the body of workers.

To download complete PPT in editable and ready to use format, click on the download file link at the end of these points

HSE Management Awareness Session ppt

Download File 

HSE Management Awareness Training Session-ppt